Let's Get Rolling
Prerequisites
Hardware Requirements
- RAM: Min. 2GB (preferably 4GB)
- Operating System: Windows (32/64 bit)/ MAC OS/Linux
Info
The framework is built using Java. Hence it will work on any Operating System which supports Java
Software Requirements
- Java 17 or above
- For customizations and contributions:
- Maven [Installation guide can be found here]
- Any IDE which supports Java Development (eg. Eclipse, Netbeans, IntelliJ etc.)
Installation
-
Step 1 : Download
- Click here to download the latest release version
-
Step 2 : Extract the zip, into a directory of your choice.
Note
The framework as such does not require any "installation" process. Simple extraction of the zip file is enough
- Step 3 : Launch
Double click on the ingenious.bat in the framework location
- Open Terminal in the installation location and then type
- Then double click on the
ingenious.command - If you see It's Downloaded From Internet warning then enter the following command in terminal:
Quick Start with Recording - Live Playwright Recorder (CodeGen)
As you interact with the browser, each action is captured and added to the Test Case editor in real time.
Steps for recording
-
Launch INGenious Playwright Studio
-
Click on the Record icon in the Test Case toolbar

-
The Choose Recording Target dialog appears. Pick where the recording should be saved:
- New test case under Test Scenario — provide a Scenario name (defaults to
LiveRecordingScenario) and a Test case name (defaults toLiveRecordingTestCase) - New test case under Reusable Scenario — provide a Reusable scenario name (defaults to
LiveRecordingReusable) and a Test case name (defaults toLiveRecordingReusableTestCase) - Click Start Recording to begin recording, or Cancel to close the dialog.
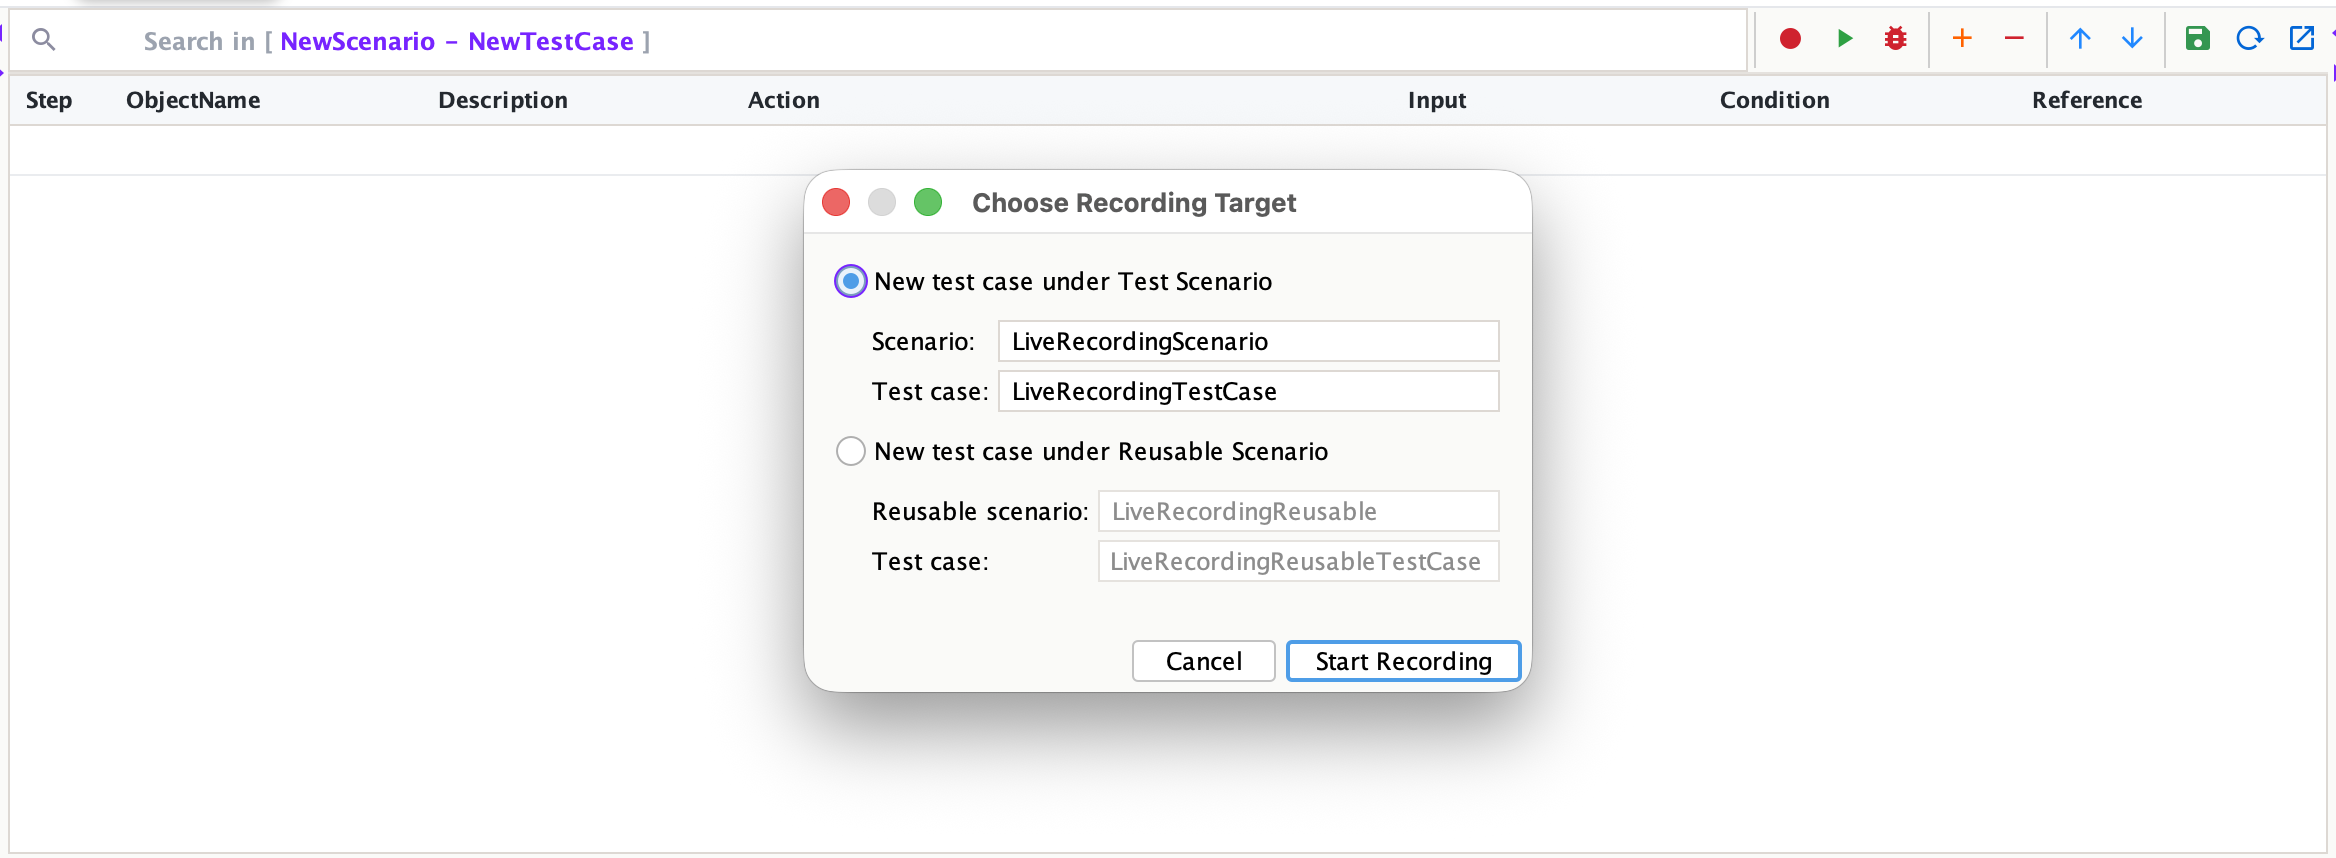
- New test case under Test Scenario — provide a Scenario name (defaults to
-
A loader will show up while the Playwright recorder is being loaded
Warning
On first use, Playwright downloads the required browser binaries. If the network connection is slow, the recorder may time out during setup. Several dialog boxes may appear during setup. Click OK to continue. Once the recorder opens successfully, close it and start a new recording session.
-
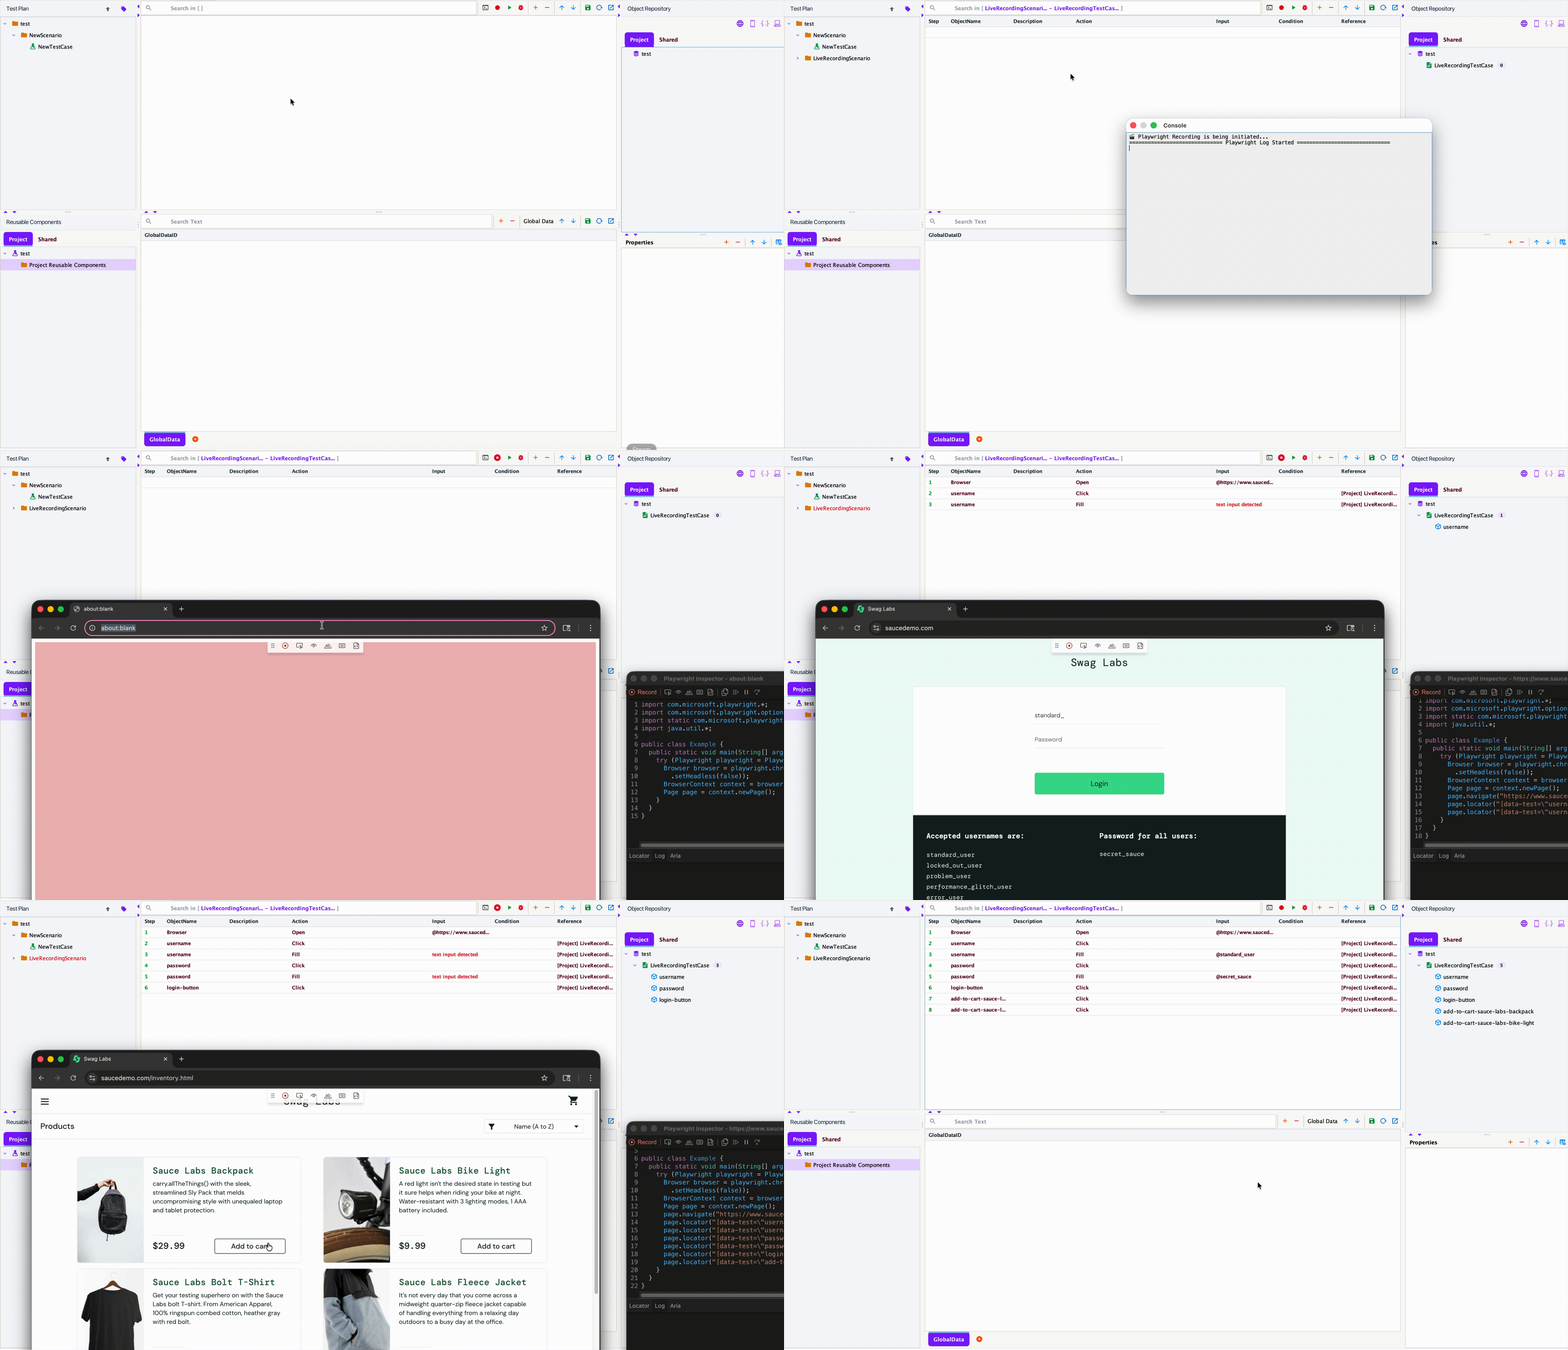
INGenious creates/opens the target scenario and test case, then launches the Playwright Inspector together with a Chromium browser window.
-
Once the recorder is ready, INGenious automatically hides the recording console and minimizes the Playwright Inspector window. This leaves the Chromium browser in focus so you can immediately begin interacting with the Playwright recorder.
-
Every action you perform is streamed live into the Test Case editor as you go:
- Each recorded step is inserted into the step grid immediately and highlighted in green, so you can see exactly what was just captured
- Any web object you interact with is automatically added to the Object Repository, under a page named after your test case
- A running log of captured steps (e.g.
Step 3 captured: Click on 'Login' [Login_button]) is shown in the recording console
-
When recording is complete, click the same toolbar icon again. The icon now displays Stop Recording. Clicking it ends the recording session. This closes the Chromium browser, stops the Playwright recording process, and saves the recorded steps to the test case.
Tip
You can also close the Chromium browser window directly instead of clicking Stop Recording. INGenious detects this and finalizes the recording automatically.. Using Stop Recording is recommended.
- Your recording is now available as a fully populated Scenario (or Reusable Scenario) and Test Case. All relevant test steps, web objects, and test data are automatically created and ready for execution or further editing.
Import a recording file manually
If you have a Playwright codegen recording saved as a file (for example, exported from outside INGenious), you can still import it manually instead of recording live:
-
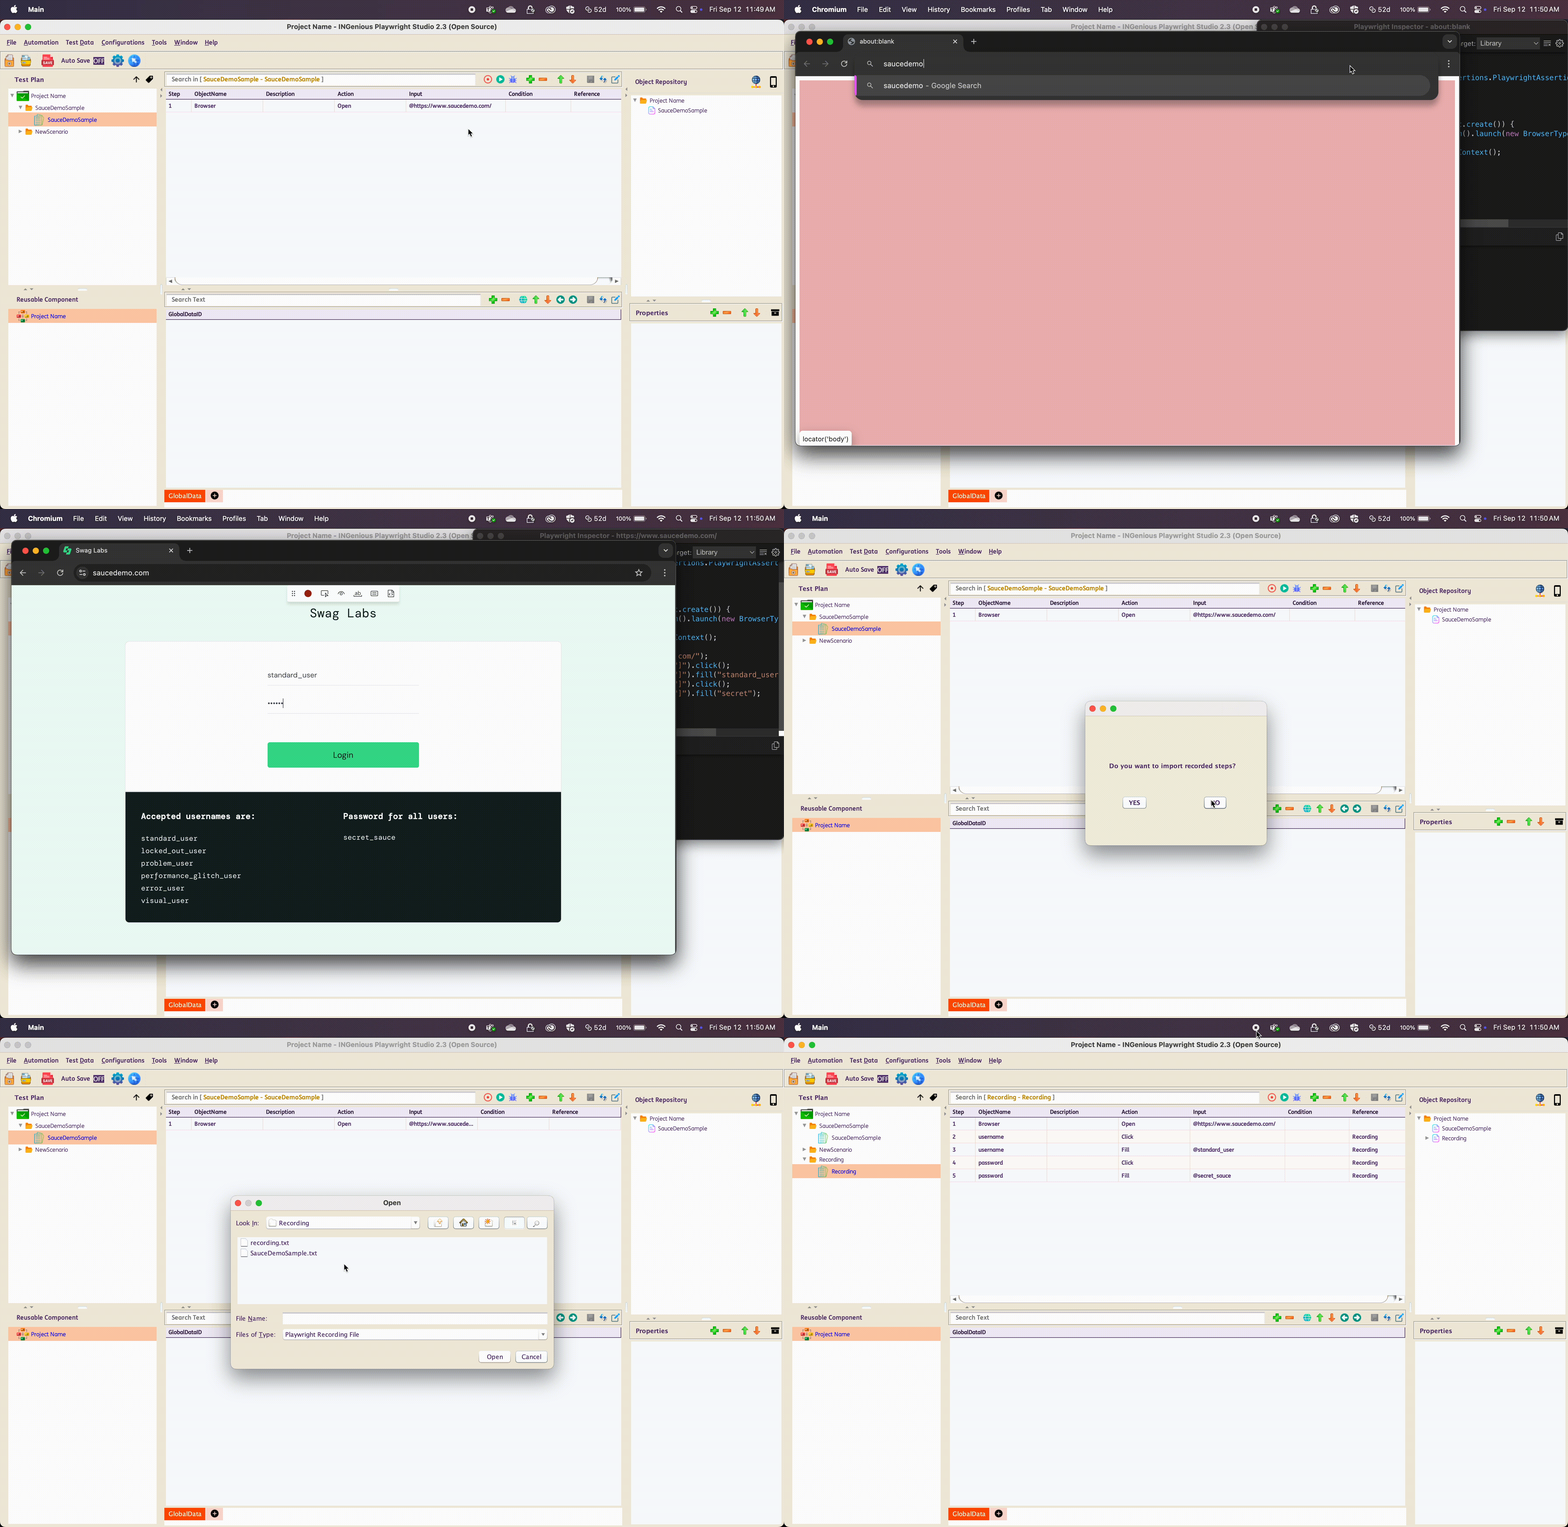
From INGenious Playwright Studio, navigate to Tools Import Playwright Recording Import Playwright Recording.
-
Locate the recording file (
.txtor.java) and click [OK]. -
The file is immediately rendered as Scenario and Test Case. All the relevant test steps with all the web objects and test data are imported.
-
All the objects are loaded in the Object Repository.
Before you begin, its important that you Know the Framework